The Best Bali Itinerary for the perfect week

Bali Griya Villas Amed


The Best Bali itinerary: must do’s and less touristy places

This was our first trip to Bali, and we didn’t know when we would return. So, we wanted to see the top spots for the best Bali itinerary, including a less touristy area.

We decided to spend the first couple of days in Seminyak, then three nights in Ubud to explore the famous jungle, followed by a stay in Amed, which is much quieter and less touristy. Finally, we spent one night in Jindabyne to be near the airport before flying home.

Bali is easy to get around, so we used each area as a base to visit temples and beautiful sights, while also enjoying some relaxing days by the pool.

We flew to Bali on a Friday night (I think we arrived at 11pm!) and flew back out one week later on Sunday night. This meant we only needed to take 5 annual leave days off work, and got 9 amazing days in Bali!

  • Day1 – Seminyak (arrive late from flight)
  • Day2 – Seminyak
  • Day3 – Ubud
  • Day4 – Ubud
  • Day5 – Ubud
  • Day6 – Amed
  • Day7 – Amed
  • Day8 – Amed
  • Day9 – Jimbaran
  • Day10 – Jimbaran (fly home in evening)

Day 1-2: Seminyak

The first couple of days of our 9 amazing days in Bali itinerary, of course, begin with Seminyak! Seminyak was everything I heard it would be: streets full of vendors, tourist shops, Australian clothing stores, boutique shops, cool eateries, nice places to drink, and sports cafes. Make it whatever you like, but we actually loved our 2 days there and could have spent much more time exploring the beaches, cafes, and restaurants around.

Mobility:

We organised a taxi pick up which was included in our hotel stay by The Amala. They also had a free taxi for guests into the Seminyak centre and we used this service to get to get around in the evening.

Stay:

We stayed at the beautiful Amala hotel. A boutique quiet oasis of luxury rooms and pool villas in the middle of the busy town.

Highlights:

  • Drinking Bintang at Corner House (has to be done!)
  • Wondering down the main busy shopping street of Seminyak – Jalan Kayu Aya (for cafes, boutique clothes stalls, and anything!)
  • Amazing Potato Head Beach Club for very chilled pre-drinks and awesome sunset views
  • Sarong restaurant for dressing up, and insanely good asian cuisine.
  • Never ending breakfast in the beautiful setting of The Amala hotel.

Day 3-5: Ubud

Lush green rice paddies, beautiful mystic temples in jungles, Ubud is really the most magical place. We made sure to split our time between busy days seeing all of the amazing places, and chill time in the amazing hotel.

Mobility:

We hired a taxi (organised by The Amala hotel) who took us from Seminyak to Ubud, he was a super nice guy and even took us to the Luwak Coffee Plantation on the way for no extra charge.

Day tour – we hired a taxi recommended from a friend (we had organised this before we left Australia). All drivers tend to use what app and all it takes is a whatapp message to book. The taxi cost $60 AUD for the entire day (8 hours).

Out and about in Ubud we used Bluebird Taxi, which is the safest taxi to use for short trips (you can flag them down).

Stay:

After so much research, we decided to stay in Kamandalu Resort. We chose the Valley Pool Villa, and it was so amazing.

Highlights:

  • Trying Luwak Poo Coffee
  • Visiting the magical Rice Paddies at 7:30am in the morning
  • Staying at Kamandalu Resort, almost a village in itself
  • Visiting the temples and waterfalls of Ubud

Days 6-8: Amed

Not yet fully on the must go tourist route in Bali, Amed felt a world away from the touristy streets of Seminyak. Amed is on the East Coast of Bali. This area is brilliant for snorkelling in the corals, seeing volcanic black sand beaches, having a beer with a view of Mount Agung (still active volcano).

Stay:

We stayed at the Griya Villas which was an absolute dream. All villas have their own pool which have a view of the East Coast Ocean, wow! This is not a small plunge pool, this is a pool large enough to swim in! When we stayed the cost was around 300 AUD a night, which was amazing value for what it was (and also included breakfast and transport).
Tip: make sure to order the floating breakfast for at least one morning, it will be a very memorable breakfast experience!!

Mobility:

Included in the hotel rate when booking directly on the website, there was free transport to and from the Griya Villas and airport. Luckily, as it was similar distance accepted to pick us up from our hotel in Ubud, and then when we left they dropped us off in Jimbaran. In fact on the way from Amed to Jimbaran there were a few temples we wanted to see in the area, and they allowed us to visit them on this journey for a very small cost.

Highlights:

  • Snorkelling at Lipah Beach
  • Outdoor cinema on Griya Villas rooftop
  • Happy hour at the Griya
  • Floating breakfast in the Pool Villa
  • Drinking beer watching the sunset with a view of Mount Agung

Day 9-10: Jimbaran

If you don’t have much time in Bali, Jimbaran seems like a great place to base yourself. Little beach town with easy access from the airport, and to places like Uluwatu, Seminyak etc.

Jimbaran has a beautiful beach and many hotels to chose from. We decided to stay here on our last night to be close to the airport and therefore to not have any panic about not being able to get our flight because of the Bali traffic!

Stay:

We chose to stay at the Intercontinental Hotel, Jimbaran. This is more of a resort than a hotel. The was very good value for money (I think we paid 200 AUD). It has a HUGE pool overlooking the beach, many restaurants to chose from on site and is in the centre of the Jimbaran beach area. When we entered it felt really like a luxury resort, a huge metal drum was played as we entered into the huge reception area. For a chain, they had really made sure they acknowledged the traditional Balinese style everywhere, some areas of the resort feeling like some of the temples we had visited.

This hotel allowed us to stay using their facilities until our flight in the evening. Therefore the day consisted of hanging around the pool and dining at their amazing Sunset Bar and Grill restaurant (where the fresh fish was delicious!).

See my articles on Travel in Australia.

Back to HomePage.
Hike the amazing Routeburn Track: The Divide to The Shelter

Routeburn trek

South Island New Zealand Routeburn Track: The Divide to The Shelter in 3 Days

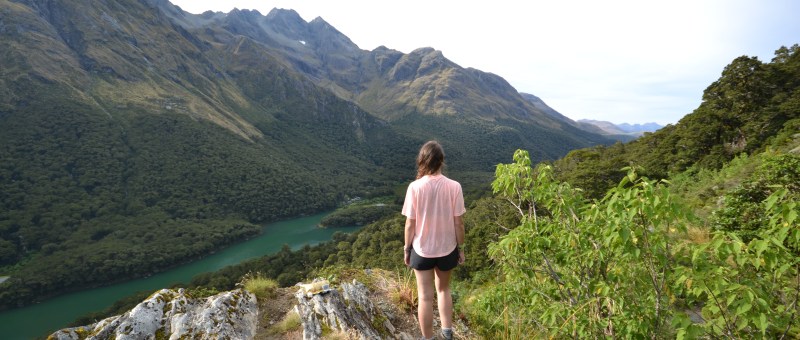
Walking past stunning waterfalls, amazing snow peak mountains, diamond shining lakes and enchanted forests, the Routeburn track is hands down the most beautiful multi-day trek I have ever done.

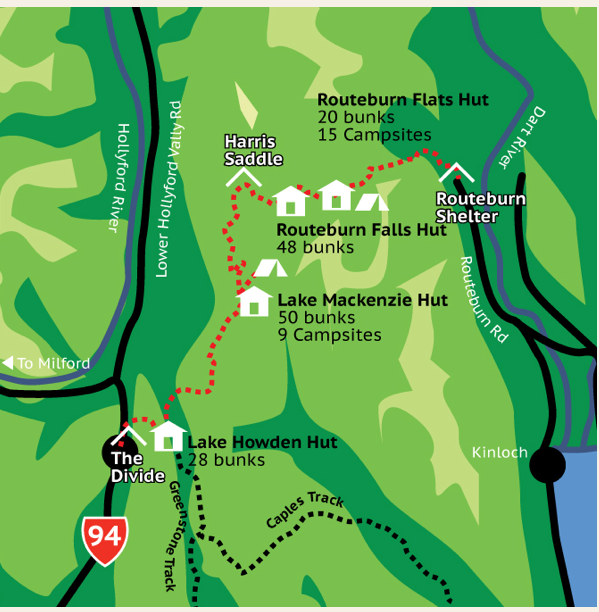
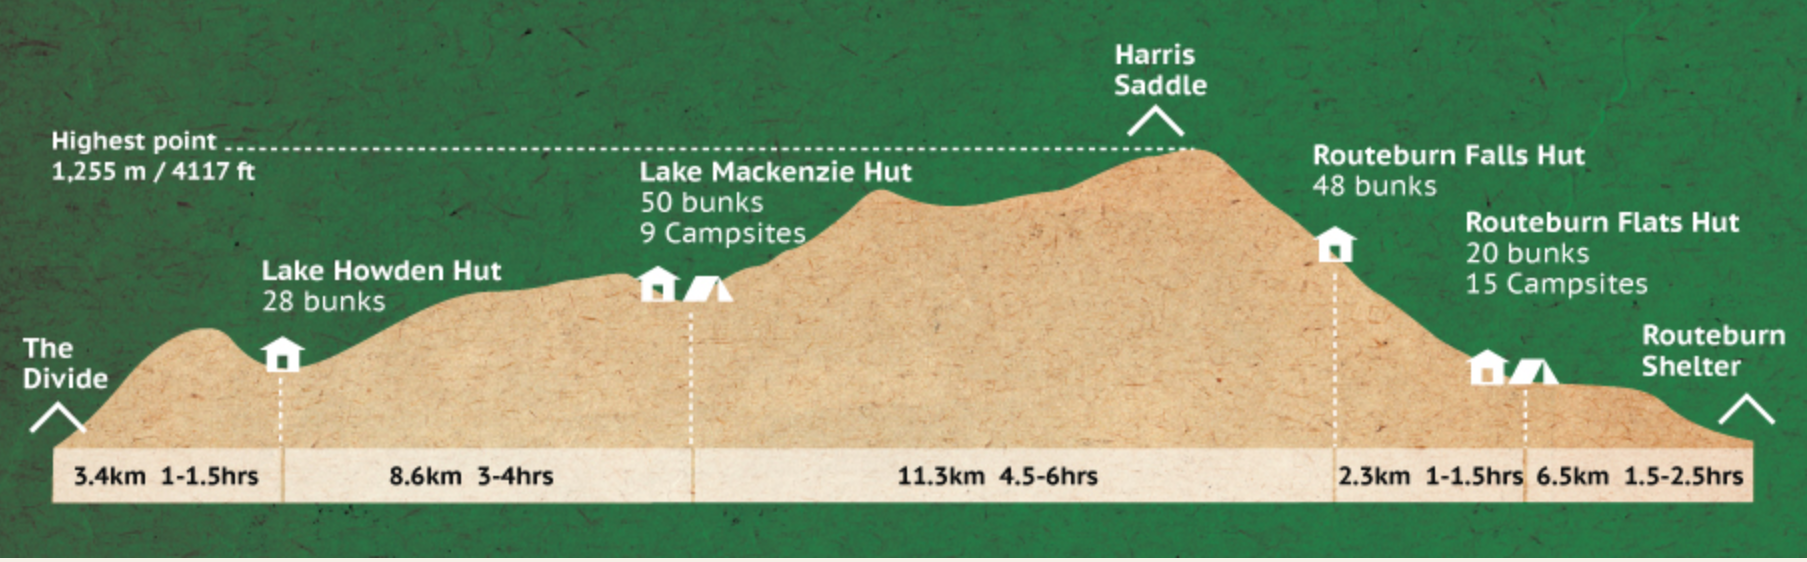
The Routeburn track is a one way 32km South New Zealand multi-day trek. It is within the stunning Fiordland & Mount Aspiring National Parks.

There are 3 popular multi-day treks in this area of New Zealand. These are the Routeburn, Milford and Kepler Track. The Milford trek is normally the most popular. This is due to its connection with Milford Sounds. It usually sells out quite fast. Both the Milford and Kepler treks are 4 days long, and the Routeburn is 3 days. This was one of the reasons we chose it. We were in South New Zealand on holiday. We still had many more areas we wanted to visit. However, for the pure beauty and variety of the trek, we are very glad with our decision.

The trek can be walked either way. The more popular way to walk the Routeburn track is from Glenorchy (Routeburn Shelter) to the Divide. However, we did it the other way, starting at the Divide and finishing at Routeburn Shelter. We did this so we could fit in a visit to Milford Sounds on day 1 of the trek. Keep reading for information on how to fit this in.

Everything you need to know about the Routeburn Track

When planning our Routeburn track, we wanted to make the most of going all the way to the divide. So we decided to do a Milford Sound Cruise before starting the trek. This made very good use of time. I would only recommend doing this in the summer months. You need daylight until late. Summer in South NZ is light until 10pm! 

  • Day 1: Milford Sound Cruise and walk from the Divide –> Lake Mackenzie Hut
  • Day 2: Lake Mackenzie Hut –> Routeburn Falls hut
  • Day 3: Routeburn Falls –> Routeburn Shelter

If you’re anything like me, I do tonnes of research. I read loads of reviews on coaches, times the trek takes, and whether there will still be bunk beds if we arrive late. Therefore I will provide all information I have in case it’s useful for someone else who, like me, likes the details!

https://www.infotrack.co.nz/track-info/routeburn-track-transport/

The Routeburn track is not a round route, it is one way. Therefore you cannot drive and pick your car up from the same place. This then leaves you options to either:

  1. Get a coach to a drop off and pick up point or
  2. Use a company that moves your car for you from the start to the end of the trail.

We chose to get the coach, as we didn’t start to rent a car until day 6 of our holiday. 

You can either start at the Routeburn shelter and walk to The divide. Or you can do it the other way. As we wanted to do Milford sound first, and this is close to the divide, we did The divide to Routeburn shelter. We chose to do it in 3 days / 2 nights.

Booking the huts

It is mandatory to have booked the huts in advance. We booked 7 months in advance. We knew January would be popular. Book as soon as you know you will be doing the trek. All can be purchased on the official site doc.govt.nz.

By booking the huts, this is almost like your ‘licence’ for doing the trek. They don’t want it to be overcrowded. You must get a stamp a day before you start the trek. You can either do this at the DOC at Queenstown or Te Anu. We did this in Queenstown a day before we started the trek. However, it would have been possible to do in Te Anu as our coach made a stop here.

It is important to know you cannot book a bed, you literally have to turn up and find a space. They do not allow the huts to be over-crowded. There will never be a case where there is no space left. My partner was not looking forward to the bed situation. He likes his home comforts and not sleeping next to strangers. But even he ended up loving it as part of the experience.

Luggage

All we took were our rucksacks. We left the rest of our stuff in the QT hotel. That is where we were staying at when we return to Queenstown. If you are on a long holiday in New Zealand, I would highly recommend doing this. You do not want to be carrying around extra weight in your bag. You will be trekking with it for 3 days. Your backpack should not weigh more than 7 kg.

We had suitcases that our rucksacks were stored in during our flight to New Zealand, and this worked out very well for our entire holiday.

Transport

We booked through tracknet.net which is the official site of the coaches. I would recommend emailing them at res@tracknet.net with your dates and times, then they will send over the form to fill out. We booked this 2 months in advance. Note they will not do hotel pick up, but the pick up location is very central in Queenstown. Their site is generally very useful.

  • Day 1 morning: Queenstown to Milford Sound: 6:55am. (5 hour journey)
  • Day 1 midday: 2 hour Milford Sound Cruise (operated by Go Orange Cruises): 12:30pm
  • Day 1 afternoon: Milford Sound to The Divide: 2:30pm (1 hour journey) Walk the Routeburn Track.
  • Day 3: Routeburn Shelter to Queenstown: 10:00am or 2:00pm. (2 hour journey, we made it for the 10am one)

The cost of this in total (including cruise) was 199 NZD per person (2019). We were told there was no place to buy lunch. So, we added a packed lunch for 19 NZD per person. In the end we did see some snacks being sold on the cruise. The other choice would have been to take a packed lunch.

Conveniently we were told we could leave our backpacks on the bus while we did the Milford Sound Cruise. It was the exact same bus that was taking us to The Divide. This helped a lot.

Day 1 Routeburn Trek: Milford Sound Cruise + The Divide to Lake Mackenzie Hut

On Day 1 of the trek, we got picked up at 6:30 am. The pick-up was from a point in Queenstown City Centre. We stayed on the coach all the way to Milford sounds. The bus stops at the Te Anu stop. You can get your official Routeburn stamp here at the DOC office. We had already got our stamps in Queenstown the day before. We didn’t need to do anything here apart from a quick toilet stop.

The bus actually also goes past The Divide. We knew we’d start the trek there later in the day. A few people got off. the bus at that time to start the trek. This made me a little nervous about finding a bed, but future-me knows there was nothing to worry about.

We got to Milford Sounds at around midday, and took the cruise – what a beautiful spot in the world!! The whole bus journey was extremely scenic also. While you are in the area, it is vital you do not miss Milford Sounds. It is labelled the 8th Wonder of the Natural world and for good reason. Doing it before you start the trek is an extremely convenient way to fit it into your New Zealand Itinerary.

The same bus then took us back to the divide and we started the trek at around 3:30pm.

This day was insane, from walking on the edge of mountains with endless views of snow capped mountains. Walking past stunning Lake Howden, and walking almost through the most incredible waterfall I have ever seen in my life… wow.

This day trek took us about 4 hours of walking. This included a 30-minute break at the area around Howden hut. We arrived at Lake Mackenzie hut at 8pm.

Lake Mackenzie huts are very well maintained and quite a few different dorms which are in different buildings. The sleeping bed are long plastic mattresses on bunks. It is important to that you have your own sleeping bag with you and something for a pillow. Even for those people who like their luxury, this is not a bad situation for just one night. A few of the dorms were already full, but we managed to find a dorm with plenty of space. We managed to get the end of one of the long mattresses so there was no one on one of the sides. The other person was about 2 metres away on the other side.

The kitchen facilities were good, we only needed to use the stove as we took our own travel pan and freeze dried meals.

Day 2 Routeburn Track: Lake Mackenzie hut to Routeburn falls hut

Waking up at this beautiful lake and having a morning coffee was a very memorable experience. There is something about waking up in nature. Doing a trek with just a backpack always feels raw and fantastic being in the wilderness.

Today’s walk started through a beautiful moss covered enchanted forest. Then shortly followed by a stunning view of a gorge on one side, and snow capped mountains on the other.

This part of the trek then allows you to walk above the clouds, how amazing.

Side trip to Conical hill (1-2 hours)

On day 2 there is an optional side track to Conical Hill which will take an additional 1-2 hours. This will take you to very lord of the rings stunning mountains. There is a small scramble at the end, and if it had been raining may be quite slipping.

Arriving at Routeburn Falls Hut

Day 2 took around 8 hours including the Conical hill side track, and with stops and photos. We arrived at a beautiful waterfall at around 3:30pm and had a nice rest.

Routeburn falls hut was pretty spectacular. I was quite sure these huts would feel like ‘slumming it’. In reality where else can you stay in accomodation with views this stunning. Also these sets of huts felt very clean and great facilities.

Unlike the Lake Mackenzie huts which had long shared mattresses, the Routeburn falls hut had single bunk beds. The rucksacks nicely fit under the bottom bunk, so if you are in a 2 then you can take one side of the bunk beds.

After watching the sunset from the hut balcony we cooked our freeze dried Back Country Cuisine food. This evening we had bought a dried ice cream also). We did notice a few people had bought a small flask with some liquor in. We noted this as a great idea for next time.

Day 3 Routeburn Track: Routeburn Falls Hut to Routeburn Shelter

The final day of the trek, we were feeling slightly tired but energised by the excitement of the trek. Getting up at 6am so that we could make the 10am coach, we had our breakfast and coffee and left before most people were awake.

This day took us through forests, over swing bridges and through fields. Another beautiful day. The morning fresh air and smell of trees was wonderful.

We passed the Routeburn flats hut, stopping for some water and a snack. We made it to Routeburn shelter by 9:30am. Perfect timing to be picked up at 10am. Everyone fell asleep on the coach from tiredness. I opened my eyes at one point and saw the absolute beauty of the Glenorchy mountains, making a note that we need to visit there one day, before falling asleep again.

The Routeburn track gave us everything we wanted from a multi-day trek. We were very lucky with the weather, having not rained at all in the 3 days. We didn’t see that many people while on the trek, only now and then. This meant most of the time it felt like we had the track to ourselves.

Now we are dreaming of the next multi-day trek we can do in the beautiful wilderness. As well as cherishing these memories for our life.

Read the full South Island New Zealand South Island New Zealand.

Honeymoon in Bora Bora: The Ultimate Bucket List Destination

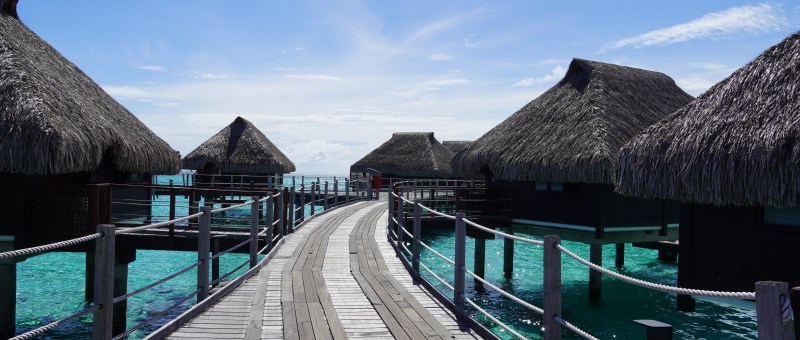
Overwater bungalows with pool Bora Bora

Bora Bora is on most peoples bucket lists, and for good reason. This place is what dreams are made of. It is quite insane to believe that somewhere as beautiful as Bora Bora exists on our Earth. The clearest turquoise water you will ever see. The amazing mountains that rise tall above all resort. Not to leave out the breathtaking lagoon and snorkeling. A honeymoon in Bora Bora is what honeymoon dreams are made of.

It was on our bucket list for many years. Finally we made the plunge to go for a Honeymoon in Bora Bora. Was it expense? Of course. Was it worth it? Every penny.

If you need the encouragement to go, maybe for a honeymoon or anniversary, keep reading this post for inspiration pictures.

Accomodation – which Bora Bora hotel?

Bora Bora is famous for being the island of overwater bungalows. It would be wasted to not stay in an overwater bungalow for some of the days you are there. It is possible to do a combination of both land and overwater bungalow, you will just put through two bookings. The hotels are extremely used to people doing this.

The two hotels we were deciding between were Four Seasons Bora Bora and Conrad Bora Bora. These are two of the best hotels in the world. After much research, we decided to stay in the Conrad Bora Bora. This was due to a few different reasons:

  • At the time Conrad had just been refurbished and the rooms looked more modern.
  • We wanted to stay with the same hotel brand in order to maximise the status points. This can potentially get an upgrade (which did happen). See my page How to Obtain Hilton Honors Gold Status Through Status Match.
  • Conrad was in general better value than Four Seasons for the overwater bungalow with a pool. Which meant we could stay one more night.
  • Some people prefer the Four Seasons as you get the clear view of Mount Otemanu. In reality, it really depends on which room in the Four Seasons you are in. In Conrad you can book a room that has the direct view of the mountain. You also see it if you go on a walk around the Conrad resort. Also of course on a boat tour (which is a must).
  • The coral and snorkeling at the Conrad was rumoured to be better. We cannot compare as we did not go to the Four Seasons. However I can confirm the coral and fish around the resort were amazing.

Conrad Bora Bora

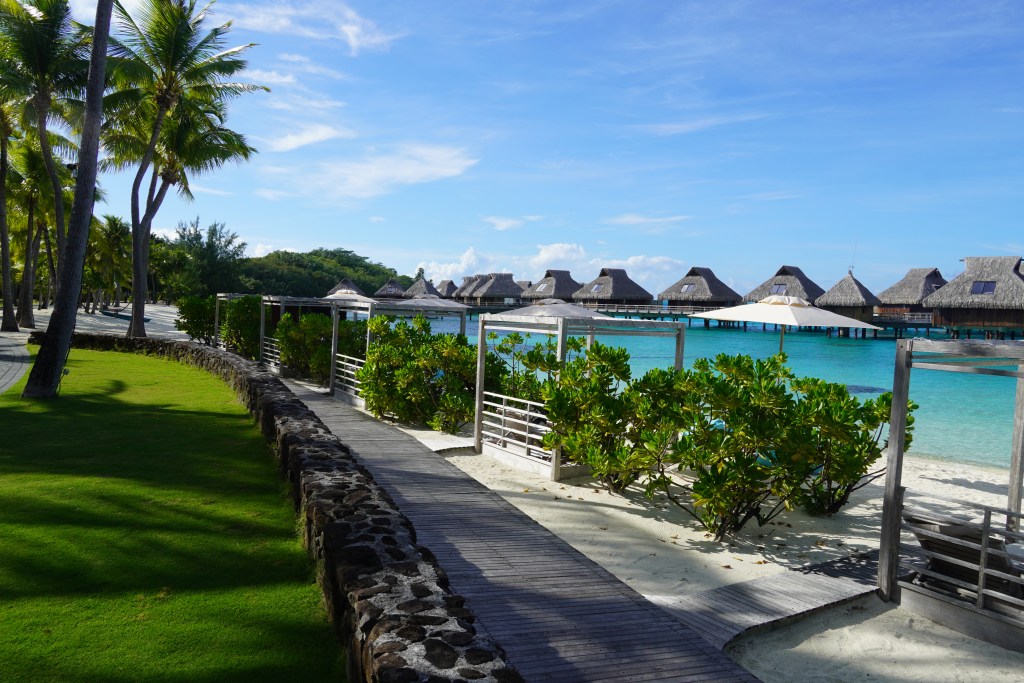
In the end, we were extremely happy with our choice of Conrad for our honeymoon in Bora Bora. It was the absolute perfect hotel for our honeymoon. The Conrad Bora Bora is truly one of the best hotels in the world. It has many restaurants, all top notch. Stunning white sand beaches. Butler service by text message. Amazing cocktail bar on the sea (Upa bar). Fire and dancing shows. Huge rooms with vast bath tubs, huge terraces and large private pools. The most beautiful resort pool, with floating lounge chairs and swim up bar. You can entertain yourself by just walking around the property and soaking up the stunning luxury.

We booked a ‘King Overwater pool villa’. When we arrived, we got upgraded to a part Otemanu view pool overwater villa. Most likely this was due to gold Hilton status and availability due to low season. Our villa was also on the end of the line of villas, so we had the utmost privacy.

Time of year

I did a lot of research to understand what the best months for a honeymoon in Bora Bora. In the end we opted for a shoulder season – early-mid April. We had the most amazing weather, perfect temperature, no rain and blue skies.

The flight from Moorea to Bora Bora

I actually had not paid much attention to the domestic flights in French Polynesia, just seeing them as a way of getting from A to B. How wrong I was, this flight is the most beautiful flight I have been on in my life. The views from above are as good as you would get on any sea plane. On a clear day, Mount Otemanu and the surrounding lagoon are so clear and absolutely stunning from above. You can also see all of the overwater bungalows from the many resorts. Just amazing.

From Moorea to Bora Bora you need to sit on the left hand side of the plane to get the best view. From Bora Bora to Tahiti it is the right side. Note that the domestic airlines (we flew with Air Tahiti) have no seat bookings. It is first come best seat. Make sure to get in that queue early to get the correct side of the plane!

Arriving in Bora Bora

You need to make sure you have pre-booking your pick up in Bora Bora. Easiest thing to do is to book directly with the hotel.

The ‘entrance’ for arrival in Bora Bora is unlike any other place on Earth. You go straight from plane to boat. No car, no roads, just straight onto a boat. This unique experience was incredible. The Conrad Bora Bora boat is extremely luxurious, and almost had a James Bond feel. This is a pretty special way to start the holiday!

Once you arrive at the Conrad, you will go to Upabar which is luxury sofas looking onto the endless ocean. It really felt like we were in a movie. Think ‘Couples retreat’, ‘Blended’, or ‘Just go with it’ vibes.

Bora Bora in pictures

All resort photos are taken at Conrad Bora Bora.

Private boat tour

You could easily spend your whole time just chilling in your room or at the pool, reading, snorkeling, eating, drinking cocktails. This needs to be a huge part of your time on the island.

However one activity not to be missed is doing a private boat tour around the island. This will elevate your Honeymoon in Bora Bora to the next level. We booked directly through Moana Adventures website, by email a week prior to the date. The name of the tour we did was ‘Private Shark & Ray, Coral Garden Snorkel Safari’ on a Cap Camarat 25fts.

This was a 3 hour tour, and we opted for the morning so we got picked up directly from Conrad jetty at 9am. The benefit of doing a private tour is you get to slightly tailor your tour on what you want to see. Swimming with Mantarays was high on the bucket list for us, and our tour guide took us to a guarenteed spot right in front of Mount Otemanu. He also later spotted another Mantaray as we were cruising, and stopped for us to jump off the boat to see it.

The snorkelling on this tour was otherworldly. I did not know that coral like that still existed in the world. It was so colourful and amazing.

We ended the tour by swimming with stingrays and reef sharks, where they come up right next to you.

Wow, this day will be a forever memory.

This holiday is the romantic holiday of dreams. You will have an unforgettable experience taking in the beauty of this pacific island.

Leave any comments in case you have any questions.

Check out my blog on Bali for another dream honeymoon location idea.

South Island New Zealand

10 Magical days in South Island New Zealand

If I could describe South Island New Zealand in one word, it would be magical. Perhaps this association is due to its connection with the “Lord of The Rings,” but setting that aside, the region is renowned for being one of the cleanest, purest, and most naturally beautiful places in the world.

It took me a long time to visit the South Island New Zealand, as I had already been to the North Island during a gap year. Now, living in Sydney, the South Island is only a 3-hour flight away, so it was very high on the priority list while we are living on this side of the world.

Our itinerary combined a good mix of activity and relaxation. We also had the chance to visit some of the must-see places that are at the top of most people’s lists!

Time of year

We chose to go at the end of January, which in New Zealand is the height of summer. Mainly because we wanted a higher chance of good weather, and one of the main activities we wanted to do was a multi-day independent hike. Summer in the South Island New Zealand is not like summer in Australia. It is still an average of low 20s during the day. We did not get a single day of rain during this time, but I understand this is very unusual! Therefore for a trip where you want sunshine, less chance of rain, good weather for trekking and eating and drinking outside then I recommend the summer, late spring or early autumn is for you.

The other great point about summer is that it doesn’t get dark until after 9pm, this was great for us while doing the Routeburn trek, as we started this slightly later in the day after going on a Milford Sound cruise.

Saying that though, I’ve heard that winter offers a totally different vibe with snow-capped mountains, cozy bars serving mulled wine, breathtaking scenery, and skiing, which sounds equally amazing. However, the treks may be off-limits, especially the multi-day treks (since there’s no ranger during this time, and people go at their own risk, so it’s only for the most experienced). It still sounds like an awesome experience, just a different one.

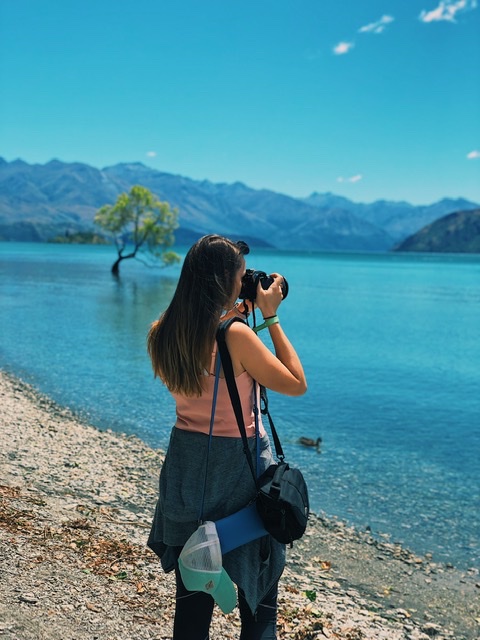
Taking photos at Lake Wanaka
Me taking too many photos at Lake Wanaka 😅 

Itinerary for an unforgettable South Island New Zealand trip

Follow this itinerary or get inspiration if you want to see the Best of South island New Zealand and also incorporate an awe-inspiring multi day trek.

  • Day 1: Fly into Queenstown
  • Day 2: Queenstown
  • Day 3: Routeburn Trek
  • Day 4: Routeburn Trek
  • Day 5: Queenstown
  • Day 6: Wanaka
  • Day 7: Wanaka
  • Day 8: Twizel
  • Day 9: Mount Cook
  • Day 10: Fly back from Christchurch

Days 1-3: Queenstown

We flew from Sydney and arrived in Queenstown early afternoon. We picked up a taxi from the airport, and it was a short taxi ride into the town.

Queenstown really is a great place. It does not feel commercialised, as there aren’t any high rises, and therefore it has a small town ski village feel. We found everyone super friendly also! We found that we would go into a shop and be caught up for 30 mins as the staff would just talk to you like your best friends. It seems to incorporate the chilled backpacker vibe, with a high end plus super eco friendly town. 

Stay at The Waterfront in Queenstown

This time round stayed at The Waterfront, which have amazing balcony views of the lake. It is really just beautiful. It is only a 5 minute walk to the Main Town Pier and centre, great location to explore the town.

Must do’s in Queenstown:

  • You can’t miss it, but seriously, Ferg burger has turned into a must-visit for tourists. And they’re so damn tasty.
  • Picture yourself chilling in the hot pool at Onsen hot pool, soaking in the stunning view of the valley. Just make sure you book well in advance – we’re talking months ahead! They offer a pick up service in case you haven’t got a hire car.
  • For great cocktails, friendly staff and breathtaking views visit Red’s bar at QT. !
  • Hang out at the main town pier. Grab a leisurely lunch or dinner, or enjoy a glass of wine at one of the restaurants (like Ivy & Lola’s) while taking in the stunning view of the serene lake and towering mountains. It’s the perfect spot for a meal with great vibes and even greater views. My partner and I still reminisce about this place.
  • Check out all the cool activewear shops. When you’re in Queenstown, you gotta rock that Kathmandu or Macpac all day!
  • The Skyline is super popular, but we decided to skip it because it seemed too touristy. We knew we’d get breathtaking views on the trek anyway. However, if you’re not up for a trek, this could be a great option to catch some spectacular views.
  • Have a drink at The Lodge Bar by Road and Gunn to live out those European Ski Lodge bar vibes.
  • Pog Mahones Irish Pub & Restaurant. ‘Cause it’s Irish and totally awesome! 🍀 

Queenstown is a must visit town in South Island New Zealand.

Days 3-5: Routeburn trek (including Milford Sounds visit)

The incredible Routeburn trek still holds a special place in my heart. There’s so much to say about it that I’ve written a separate post. Check it out for a guide on doing the 3-day, 2-night Routeburn trek and visiting Milford Sound here: Ultimate Guide to Routeburn Trek.

Day 5: Back to Queenstown

Back in Queenstown after the trek, I found myself falling even more in love with the town when we stayed at the QT, a fabulous hotel. If you have done a multi-day trek, staying at somewhere a bit of luxury afterwards is a great reward!

Accomodation: QT in Queenstown

This time in Queenstown, we indulged in the exquisite luxury of the QT hotel after two nights in humble huts. The QT is truly a superb hotel in Queenstown, offering a great experience year round. The beautifully decorated rooms with charming balconies have a delightful ski-lodge ambiance, creating a truly enchanting retreat.

Days 6-8: The wonders of Wanaka

At this point we picked up our hire car and started the road trip from Queenstown to Wanaka, through the beautiful Central Otago region. There are many stops on route, we stopped at Cardrona Distillery The Source Gin which is definitely worth a visit!

Once we reached Wanaka, we settled into our accomodation and found the finest bars along the waterfront. Be sure not to overlook the Wanaka tree and make sure to visit Rippon winery for stunning vistas! Continue reading for the top suggestions in Wanaka. We stayed in Lake Wanaka Lodge which was great value for somewhere clean, comfortable and walkable to town. Check out Whare Kae Lodge & Chalet if you are after ultra luxury.

Must do’s in Wanaka

  • For that quintessential New Zealand wine meets stunning postcard perfect views, head to Rippon winery. This is honestly has to be the most beautiful winery in the world. Make sure to book ahead for the tasting.
  • A not to be missed view, spend time skimming stones and taking endless photos of ‘that Wanaka tree’.
  • Have a few fresh ginger beers and listen to great live music in the courtyard of Cork bar.
  • For views and an awesome higgledy-piggledy bar with a great name head to La La Land.
  • For a magical one day trek plan to do Roy Peak.
  • Eat at Kika restaurant for beautiful fine dining food. Garden Ramsay also agrees!

If you like wineries check out the Australia wine regions in Mudgee and Hunter Valley.

Days 8-10: Mount Cook South Island New Zealand region

Leaving the iconic views for last, we wrapped up our trip in the breathtaking Mount Cook South Island area. We spent one night in Twizel and another right next to the Mount Cook walking tracks. Keep reading for accommodation details.

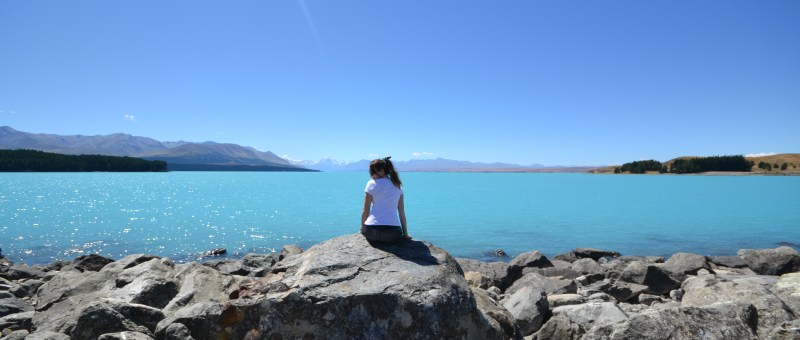
Wanaka to Twizel was under 2 hour drive and we made use of this day by visiting the ultra blue Lake Pukaki. I had always wondered if the water was really that blue, and yes on a clear sunny day it truly is! We parked at Alpine Salmon Store, we weren’t so much interested in the Salmon (though I’m sure its extremely fresh) but they had parking and a shop where we got a coffee and ice cream. This spot is a great place to have a lie down on the rocks and soak up some rays (with factor 50+ of course).


We then headed back to our accomodation for the evening which was Heartland Lodge, a lovely homely B&B with an awesome breakfast.

On the second day in the Mount Cook region, we commenced our journey to our next accomodation in Mount Cook National Park. Our road trip began by passing a lavender farm offering Lavender coffee or ice cream, and enjoying the iconic road and mountain vista at Tapataia Mahaka Peter’s Lookout.

We then continued to our next accomodation, the Hermitage Hotel. This hotel is a big hotel and the rooms are quite basic, but what makes this hotel a stand out is the bar with full glass view and also the location. The location is sat in the national park and only 5 minutes to Mount Cook airport (for scenic flights) and the famous walks.

Glacier landing at Mount Cook

As soon as we checked into our hotel, it was time for a scenic helicopter ride that we had booked for 13:30. We then drove to the tiny Mount Cook airport (pick-up service is also available). We opted for the Tasman Taster experience through Inflite Experiences, and although the check-in process took some time, the opportunity to land at a glacier was truly magical. It’s important to note that you may not be able to sit in the front or next to a window in the helicopter. In our case, the other girl and I had the opportunity to sit in the front as we were the lightest, while the guys had to stay at the back to ensure even weight distribution.

Weather-wise, during the height of summer, it felt a bit chilly on the glacier, but we didn’t need a ski jacket or thick trousers. I was still wearing 3/4 leggings, a t-shirt, shirt, fleece, and a thin scarf, and this was adequate. You are only on the glacier for 5-10 minutes, so it’s not enough time to feel the cold. If you are like me, you will be running around in the snow anyway :).

Hooker Valley Track, one of South Island New Zealand’s best

After landing, we drove straight to the Hooker Valley track, arriving there around 3 pm. The Hooker Valley track is known to offer excellent value. You don’t have to work very hard (the walk is easy) to be rewarded with incredible views. This track should be included in any itinerary for a trip to the South Island of New Zealand.

The day finished with having a drink and dinner at the Hermitage Hotel hotel, and wow that bar has stunning views. We were also extremely fortunate to witness a pink sunset going behind the Mount Cook mountains that evening, what a spectacular day!

The following morning we started our drive to Christchurch airport, stopping at Lake Tekapo on route. This lake is equally as blue, and has a famous Church of the Good Shepherd, which is like something out of a movie. However it was a lot busier than Lake Pukaki, so not really a place that you can chill out.

Our drove continued, with a bit of traffic and some roadworks. However we were lucky enough to be in high spirits dreaming of the magical 10 days we’d had in South Island New Zealand, and wondering when we will get the chance to go back.

To explore amazing destinations in Australia, check out Lord Howe Island and Hike Mount Kosciuszko in Winter.

How to Obtain Hilton Honors Gold Status Through Status Match

Miricaptures Hilton

This is a guide based on my own recent experience on how to achieve Hilton Honors Gold Status by using their Status Match feature.

Eight months ago I wasn’t even collecting any hotel status or loyalty, I was mainly using hotel.com or booking.com to book all holidays. This all changed when we decided to have a fully splash-out kind of honeymoon (the best kind). However we soon realised how expensive even breakfast is in these hotels, so I started to research our options.

Our honeymoon destinations were New Zealand, Moorea and Bora Bora, the later two being in the super duper Honeymoon capital French Polynesia. In French Polynesia there are a wide range of known hotel chains. However, these are not your bog standard city corporate Hilton or Marriott, these are overwater tropical heaven. You do not even recognise the hotels as their brand. After doing some research and seeing the benefit of staying in the same brand for our honeymoon we decided to stick with Hilton (which includes Conrad brand).

One main advantage of being Gold Status with Hilton Honors is that you automatically get free breakfast. It sounds crazy but if we had paid for breakfast during our honeymoon, that alone would have cost over $1000!

Keep reading on how to get Hilton Honors gold status without needing to spend much to get there.

Step 1: Get gold status loyalty with another hotel brand

Luckily enough, I already had 7 nights with Novotel after a work trip earlier in the year. Novotel is part of Accor group. To reach gold status with Accor requires 30 status nights. However this can actually be achieved without completing all of the nights!

Get 20 free nights with AccorPlus

Most of the time there is an offer on with Accor to sign up for AccorPlus. At the time there was an offer for Accor Plus Traveller Membership for 4000 Accor live points. I had some points with Qatar that were about to expire and saw I could transfer these to Accor. That gave me enough to get this membership without spending a penny.

Screenshot

As you can see with Accor Plus – you get 20 free bonus nights. I do not know any other hotel that does this and this is why Accor was my choice.

As mentioned, in order to get gold status with Accor you need 30 nights. It’s also important to know that Accor has strict timing to achieve the 30 nights, this has to be within the Jan-Dec of the year. At the end of each year status nights get wiped and you have to start collecting again from scratch. The following year your loyalty will be whatever you achieved in the previous year.

I had 3 nights left to reach 30 nights. Two of these nights we completed by booking a local Ibis Budget for under $100 (note yes you do have to check in and out in person). Some Ibis Budget do not count towards Accor status nights, so make sure to check this in the app before hand (when looking at the hotel check for the All Accor tick). The last night we splashed out for a nice end of year night in a city hotel that was on Accor red hot rooms.

Gold status achieved! I don’t want to miss the great things about Accor gold itself: good discount on the hotel restaurants, red hot room deals, and free upgrades if vacancies.

To summarise gold status with Accor:

  • 30 nights are required to be completed in the calendar year to achieve gold.
  • If you achieve gold status in 2024, you will have gold status until the end of 2025.

Step 2: Accor status match with Hilton

Once you achieve gold with another hotel brand, you can then apply for that status match challenge with Hilton. Note that: you only can do this once in your lifetime so choose wisely (e.g. I did it for my honeymoon), also the status match is only for 90 days so time it correctly.

There is normally a deal as well, that if you stay with Hilton for over 8 nights during those 90 days then you can keep your Gold status for at least a year, and 14 nights you get Platinum status for at least a year.

Now let’s talk about the status match procedure. The link to submit the Hilton Honors status match is as follows https://www.hiltonhonors.com/en_US/status-match/landing/.

You will notice that there is no option in the download for Accor, but there is an option for ‘other’. I selected this option and wrote All Accor. You also need to upload the evidence of a recent stay that you have paid for with that hotel brand and proof of your status. Now it is all in their hands, they have no commitment to approve everything.

My status match got approved within 10 days, which I believe is about average timing. Note that as Accor is not in the list, I suspect they may be a bit more picky on this. As I am based in Australia I think this probably helped as there is less loyalty to the Hilton Honours brand here than there would be in the US.

Now once this gets approved all you need to think is….was all of this worth it?

The Answer: Yes…yes it was 🙂

Oh and we ended up with Platinum status until March 2026. So where to next!

Bora Bora Conrad Hotel

Dive into my blog post all about an incredible honeymoon in Bora Bora, featuring tips on accommodations and tips for your vacation.